Flower Drawing is a delightful and creative endeavor that allows one to capture the beauty of nature on paper. Whether you’re a seasoned artist or just starting, the process of bringing a flower to life on a blank canvas can be both meditative and inspiring. Begin by sketching the basic outline of the flower’s petals, paying attention to their shape and arrangement. Add intricate details like the delicate veins on each petal, and carefully consider the shading to create depth and dimension.
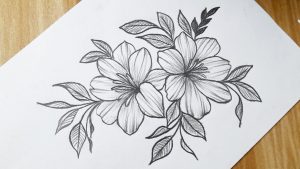
Exploring the Art of Flower Drawing
Let’s dive deeper into the enchanting world of flower drawing!
I’m thrilled to see your passion blossom, and I’m here to guide you on this artistic adventure. To personalize your journey, tell me what sparks your curiosity most:
1. Capturing the Essence:
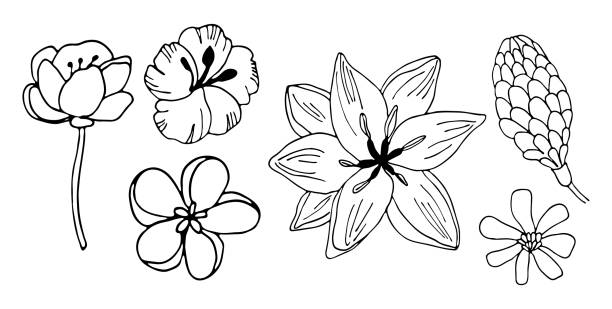
- Botanical Illustration: Do you want to draw flowers with scientific accuracy, dissecting their structures and highlighting their intricate details? Imagine capturing the velvety fuzz on a pansy or the spiky veins on a cactus under a magnifying glass. (Image of Botanical illustration of a pansy with detailed veins)
- Emotional Expression: Or are you drawn to conveying the emotions flowers evoke? Think about portraying the shy elegance of a calla lily, the joyful vibrancy of a daisy, or the melancholic beauty of a wilting rose. (Image of Calla lily drawing with soft lines and subtle shading)
2. Choosing Your Medium:
- Pencil Sketching: Do you enjoy the simplicity and control of pencil strokes? You can create delicate outlines, intricate hatchings, and playful cross-hatching to bring your flower to life. (Image of Pencil sketch of a tulip with cross-hatching)
- Watercolor Magic: Or are you captivated by the fluidity and vibrancy of watercolors? Learn about wet-on-wet techniques for dreamy washes, layering for depth, and dry brushing for delicate textures. (Image of Watercolor painting of a morning glory with wet-on-wet technique)
3. Blossoming into Style:
- Realistic Rendering: Do you dream of creating hyperrealistic flowers that seem to leap off the page? Mastering techniques like light and shadow, color blending, and texture simulation will unlock this world of detailed beauty. (Image of Hyperrealistic drawing of a sunflower with precise light and shadow)
- Stylized Expressions: Or are you drawn to whimsical interpretations and bold strokes? Explore fauvist colors, graphic shapes, and expressive lines to capture the essence of a flower in your own unique voice. (Image of Stylized drawing of a poppy with bold colors and graphic shapes)
A Beginner's Guide to Flower Sketching
Welcome to the enchanting world of flower sketching! Whether you’re a complete beginner or looking to brush up on your skills, this guide will be your compass through the fragrant fields of floral art.
First Things First:
Gather your tools:
- Pencils: A variety of HB, 2B, and 4B pencils will give you flexibility for light outlines, darker shadows, and adding details.
- Eraser: A kneaded eraser is gentle on your paper and lets you lift graphite precisely.
- Sharpeners: Keep your pencils sharpened for crisp lines and accurate strokes.
- Drawing paper: Opt for smooth, acid-free paper suitable for sketching, like Bristol board or sketchbook paper.
Warm Up & Observe:
Before diving into flowers, loosen up your hand with some basic warm-up exercises like drawing lines, circles, and curves. Then, find your flower muse! Observe a real flower or a high-quality image closely. Notice the shape and arrangement of petals, the veins and textures, and how light and shadow play across its surface.
Sketching Essentials:
Start with light strokes: Use your HB pencil to sketch the basic shapes of the flower and stem. Think ovals, circles, and gentle curves. Don’t worry about perfection, focus on capturing the overall flow and proportion.
Refine and Detail:
Gradually add details with your 2B pencil. Define the curves of the petals, add veins and textures, and sketch the stem and leaves. Remember, light lines for delicate details and slightly darker ones for bolder elements.
Bring it to Life:
Use your 4B pencil to add depth and dimension with shading. Think about where light falls and creates shadows, and use hatching or cross-hatching techniques to create darker areas.
Embrace Experimentation:
Don’t be afraid to try different techniques and styles! Play with line thickness, hatching patterns, and even add a wash of color with watercolor pencils for a touch of vibrancy.
Beyond the Basics:
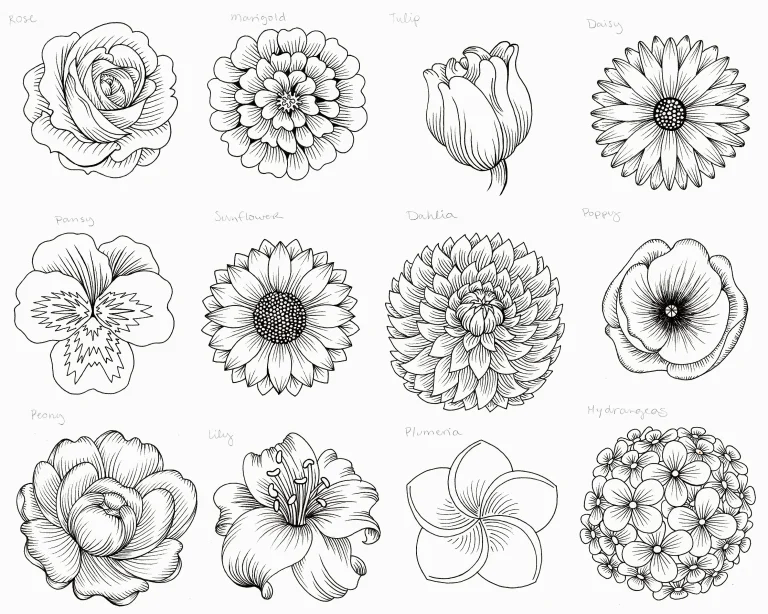
As you gain confidence, try exploring different types of flowers and drawing them from various angles. Challenge yourself with more complex flower structures like roses or lilies. You can also experiment with different drawing mediums like charcoal or even ink washes.
Mastering the Basics of Flower Illustration
Welcome to the vibrant world of flower illustration, where delicate petals and bold blooms come alive on paper! Whether you’re a seasoned artist or a budding beginner, mastering the basics is key to unlocking your creative potential and capturing the essence of these natural wonders.
Step 1: Observe with an Artist’s Eye
Before you grab your pen, take a moment to truly see the flower. Notice the intricate details: the way the petals unfurl, the delicate veins that dance across their surface, the subtle gradations of color that play within each shade. Pay attention to the interplay of light and shadow, how it sculpts the flower’s form and adds depth.
Step 2: Sketch with a Light Touch
Start with a light pencil sketch, capturing the flower’s overall form and proportions. Don’t strive for perfection; let your lines flow freely, focusing on capturing the essence of the bloom rather than botanical precision. Think of it as a conversation with the flower, a dance of observation and interpretation.
Step 3: Embrace the Language of Lines and Shading
Now, introduce the magic of line variation and shading. Thicker lines can define the sturdy stem, while wispy strokes can bring the delicate petals to life. Play with light and shadow to create depth and dimension, mimicking the way sunlight dances across the flower’s surface. Remember, shading isn’t just about darkness; it’s about creating a sense of volume and texture.
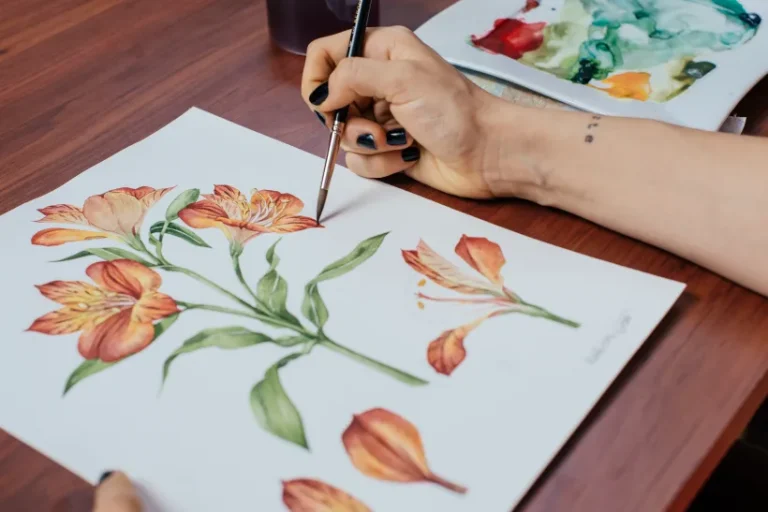
Step 4: Let Colors Sing
This is where your flower truly comes alive! Choose your medium, whether it be the vibrant dance of watercolors, the rich impasto of oils, or the soft blend of pastels. Let the colors sing, capturing the subtle nuances of the flower’s hues. Don’t be afraid to experiment, mix and match, and create your own unique palette.
Step 5: Beyond Botanical Accuracy
Remember, flower illustration is not about replicating nature with clinical precision. It’s about capturing the emotion of the bloom, its fleeting beauty, its delicate spirit. Let your interpretation shine through, whether it be through bold strokes, whimsical details, or a wash of dreamlike colors.
Drawing Flowers with Precision
Absolutely! Drawing flowers with precision requires a blend of observation, technique, and practice. Here are some key steps and tips to guide you:
1. Observation:
- Close-up study: Get up close and personal with your flower! Observe its anatomy, the shapes and arrangements of petals, sepals, and leaves. Notice the veins, textures, and subtle color variations.
- Light and shadow: Pay attention to how light interacts with the flower. Identify areas of highlight, mid-tone, and shadow. This will help you create depth and dimension in your drawing.
2. Sketching:
- Light touch: Start with a light pencil sketch to capture the basic shapes and proportions. Don’t worry about perfection at this stage, focus on accuracy and capturing the essence of the flower.
- Construction lines: Use light guidelines to help you position petals, leaves, and stems accurately. These lines can be erased later.
3. Refining and Adding Details:
- Gradually define: Once you have the basic structure, gradually add details like veins, textures, and shading. Use a variety of pencil strokes for different effects, such as thin lines for delicate veins and thicker lines for stems.
- Shading for depth: Use hatching, cross-hatching, and stippling techniques to create shadows and add depth to your drawing. Pay attention to the direction of light and shadows for realism.
- Erasers are your friend: Don’t be afraid to use your eraser! It’s a valuable tool for refining your lines and correcting mistakes.
4. Color (Optional):
- Color choices: Choose colors that accurately represent the flower, but don’t be afraid to experiment and add your own creative touch. Consider using color gradients to show depth and variation.
- Mediums: Watercolor pencils, colored pencils, or even soft pastels can work well for adding color to your flower drawing. Each medium has its own unique properties and will give your artwork a different look.

Tips for Realistic Flower Drawings
Bringing flowers to life on paper in a realistic way is a rewarding artistic pursuit. Here are some tips to guide your journey, along with visuals to inspire you:
**1. Observation is Key:
Before diving into details, spend time closely observing your chosen Flower Drawing. Notice the:
- Shape and arrangement of petals: Are they delicate and wispy, or bold and structured? How do they overlap and curve?
Veins and textures: What patterns do the veins create? Is the surface smooth, velvety, or textured?
Light and shadow: How does light play across the flower? Where are the highlights, mid-tones, and shadows?
**2. Start with a Light Sketch:
Use a light pencil to capture the flower’s basic form and proportions. Don’t worry about perfection at this stage, focus on accuracy and capturing the essence of the bloom.
**3. Refine and Add Details:
Gradually define the details like veins, textures, and shading. Use a variety of pencil strokes for different effects, such as thin lines for delicate veins and thicker lines for stems. Play with hatching, cross-hatching, and stippling techniques to create shadows and add depth.
**4. Embrace Color (Optional):
Choose colors that accurately represent the flower, but don’t be afraid to experiment and add your own creative touch. Consider using color gradients to show depth and variation. Watercolor pencils, colored pencils, or even soft pastels can work well for adding color. Apply color in thin layers, gradually building up the intensity and vibrancy.
Drawing Flowers from Life
Imagine the delicate petals unfurling before your eyes, the vibrant hues shimmering under the sun, the intricate veins dancing across the surface. Drawing flowers from life is not just a technical exercise; it’s a captivating dance between observation, interpretation, and the blossoming of your artistic spirit.
Preparation is Key:
- Gather your tools: Equip yourself with sharp pencils (HB, 2B, and 4B), a kneaded eraser, and sturdy drawing paper. Consider a sketchbook if you plan to capture fleeting moments.
- Find your muse: Seek out fresh, vibrant blooms, or arrange a bouquet with diverse forms and colors. Natural light is your best friend; position your flowers accordingly.
Embrace Observation:
- Slow down and see: Take time to truly “see” the flower. Notice the way petals overlap, the subtle curves and folds, the interplay of light and shadow.
- Sketch with a light touch: Start with a light pencil outline, capturing the overall shape and proportion of the flower. Don’t strive for perfection; let your lines flow freely, capturing the essence of the bloom.
Refine and Breathe Life:
- Gradually define details: Use your 2B pencil to define the curves of the petals, add veins and textures, and sketch the stem and leaves. Remember, light lines for delicate details and slightly darker ones for bolder elements.
- Embrace light and shadow: Introduce depth with your 4B pencil. Shade areas where light falls less, using hatching or cross-hatching techniques to create darker areas. Consider the direction of light for realistic shadows.
Beyond the Basics:
- Experiment with color: While captivating in black and white, flowers come alive with color! Watercolor pencils, colored pencils, or even soft pastels can add vibrancy. Start with light layers, gradually building up the intensity.
Developing Your Flower Drawing Technique
Whether you’re a budding artist or seasoned sketcher, refining your flower drawing skills can be a truly rewarding journey. It’s a dance between observation, technical finesse, and the blossoming of your artistic voice.
1. Hone Your Observational Skills:
- Close-up Encounters: Before your pencil touches paper, get up close and personal with your floral muse. Notice the intricate details: the way petals unfurl, the delicate veins tracing their patterns, the subtle gradations of color within each shade. Pay attention to how light sculpts the flower, casting shadows and highlighting contours.
- Beyond the Surface: Don’t just see the pretty petals; delve deeper. Analyze the flower’s structure, the arrangement of its parts, the way stem and leaves support its delicate blooms. Understanding these botanical nuances will translate into richer, more informed drawings.
2. Sketch with Intention:
- Light and Loose: Start with a light touch, using your HB pencil to capture the flower’s basic form and proportions. Think ovals, circles, and gentle curves. Don’t worry about perfection at this stage; focus on capturing the essence of the bloom with flowing lines.
- Refine and Define: Gradually introduce detail with your 2B pencil. Define the curves of the petals, add veins and textures, and sketch the stem and leaves. Remember, light lines for delicate elements and slightly darker ones for bolder features.
- Embrace Dimension: Use your 4B pencil to add depth and dimension with shading. Consider where light falls and creates shadows, utilizing hatching or cross-hatching techniques for darker areas. Remember, shading isn’t just about darkness; it’s about creating a sense of volume and texture.
3. Experiment and Explore:
- Beyond Black and White: Breathe life into your flowers with color! Watercolor pencils, colored pencils, or even soft pastels can add vibrancy and personality. Start with light layers, gradually building up the intensity and richness of your hues.
- Diversity is Key: Don’t limit yourself to a single bloom. Explore different types of flowers, each with its unique structure, color palette, and character. Challenge yourself with complex blooms like roses or lilies, or capture the delicate grace of a tulip.
Frequently Asked Questions (FAQs)
- Start with simple shapes: Begin by sketching basic shapes like circles, ovals, and rectangles to represent the head, torso, and limbs. This will help you build a foundation for your drawing before adding details.
- Pay attention to proportions: The proportions of a girl’s body are generally different from those of a boy. For example, the head is typically larger in proportion to the body, and the waist is narrower than the hips.
- Oversexualization: Avoid drawing girls in overtly suggestive poses or clothing. Focus on capturing their personality and individuality rather than their physical attributes.
- Clichés and stereotypes: Don’t fall into clichés like damsels in distress or overly bubbly princesses. Be creative and explore diverse representations of girls.
- Art books and tutorials: There are many great books and online tutorials available that can teach you how to draw girls in different styles. Look for resources specifically focused on female figure drawing or character design.
- Online communities: Join online communities or forums for artists who draw girls. This is a great way to get feedback on your work, learn from others, and stay inspired.
Related posts:
- Drawing For Kids: Basic Shapes, Cartoon Characters
- Anime Drawings : Mastering Anime drawings
- Girl Drawing : Benefits of Girl Drawing
- Drawing Pictures : Mastering the Basics of Drawing
- Scenery Drawing : Essential Tools for Scenery Drawing
- Butterfly Drawing : Importance of Butterfly Drawing
- Drawing Images : Mastering the Play of Light and Shadow
- Easy Drawing for KIDS