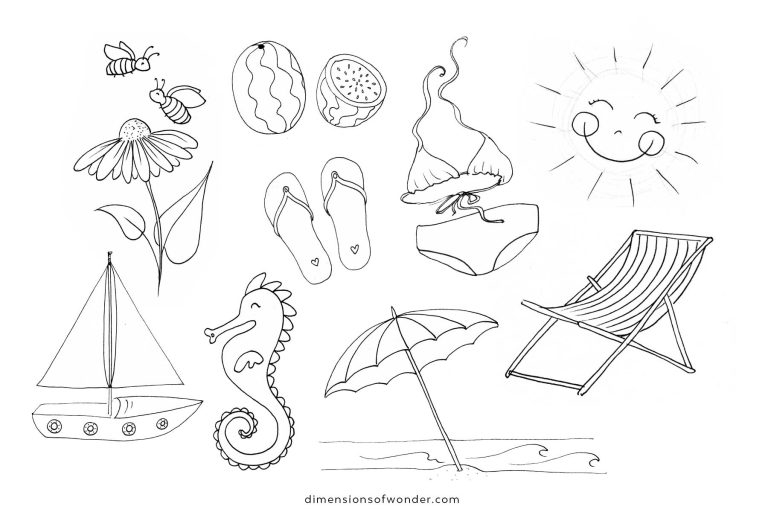
Drawing pictures is a fun and creative activity that can be enjoyed by people of all ages! It’s a great way to express yourself, explore your imagination, and develop your artistic skills. There are many different ways to draw, and you can use a variety of materials, such as pencils, crayons, markers, paints, and even charcoal. You can also draw on different surfaces, such as paper, canvas, wood, and even fabric.
A Beginner's Guide to Drawing
So you’ve always wanted to draw, but maybe you’re intimidated by blank pages or feel like you have no artistic talent. Well, fear not! Anyone can learn to draw, and this guide will be your roadmap to artistic expression.
Gather Your Supplies:
You don’t need fancy materials to get started. A simple pencil and some drawing paper are all you need. As you progress, you can experiment with different tools like charcoal, pens, colored pencils, and even digital drawing pictures tablets.
Warm Up and Loosen Up:
Before diving into a masterpiece, do some warm-up exercises to get your hand moving and mind focused. Try drawing simple shapes, lines, and curves, letting your hand flow freely across the paper. This will help you relax and become more comfortable with the drawing pictures process.
Master the Fundamentals:
There are a few basic principles that form the foundation of all drawing pictures:
- Lines: Learn how to control your lines, vary their thickness and pressure, and create different textures.
- Shapes: Understand how to break down complex objects into simple geometric shapes like spheres, cubes, and cylinders. This will help you construct accurate forms.
- Proportions: Pay attention to the relative sizes of different parts of your subject to achieve realistic-looking drawings.
- Perspective: Learn how to draw objects in three dimensions, making them appear to recede into the distance.
Practice Makes Perfect:
The key to improvement is consistent practice. Set aside some time each day, even if it’s just for 15 minutes, to practice your drawing skills. Don’t worry about making mistakes; embrace them as learning opportunities.
Find Inspiration:
Look at the work of other artists you admire, whether in museums, online, or even in comic books. Pay attention to their techniques, use of light and shadow, and how they capture emotions in their drawings.
Mastering the Basics of Drawing
Mastering the Basics of Drawing: Building Your Artistic Toolkit
Welcome to the wonderful world of drawing! Whether you’re a complete beginner or looking to refine your existing skills, mastering the basics is the key to unlocking your artistic potential.
This guide will equip you with the fundamental tools and techniques to transform those blank pages into expressive creations. So, grab your favorite drawing tool (a pencil is a great place to start) and let’s begin!
1. Familiarize Yourself with the Elements of Drawing:
- Lines: The foundation of all drawings, lines can be used to convey a variety of emotions and textures. Experiment with different thicknesses, lengths, and curves to create dynamic compositions.
- Shapes: Understanding how to break down complex objects into basic shapes like spheres, cubes, and cylinders will aid you in constructing accurate forms.
- Negative Space: The area around and between your subject is as important as the subject itself. Pay attention to how negative space shapes the composition and adds depth to your drawing.
- Light and Shadow: Mastering light and shadow techniques is crucial for creating depth and dimension in your drawings. Observe how light falls on your subject and experiment with shading to create realistic forms.
- Perspective: Knowing how objects appear to change size and shape as they recede into the distance will add realism and depth to your drawings. There are different types of perspective, like one-point and two-point, each with its own rules.
Fun and Easy Drawing Projects
Absolutely! Let’s dive into the world of fun and easy drawing projects that will unleash your inner artist and spark joy, regardless of your skill level.
1. One-Line Faces:
This playful project is perfect for a quick burst of creativity. Grab a pen and, without lifting it from the paper, draw a continuous line that forms a whimsical face. Add eyes, ears, a nose, and a smile – let your imagination guide you!
2. Blind Contour Drawing:
Challenge your perception and train your hand-eye coordination with this blind contour drawing exercise. Choose an object, like a vase or a fruit, and position it in front of you. Close your eyes and slowly trace its outline on paper, feeling its shape rather than relying on sight. Open your eyes to reveal a surprisingly accurate and expressive drawing!
3. Zentangle Patterns:
Doodling gets a sophisticated upgrade with Zentangle. This meditative art form involves creating repetitive patterns using basic shapes like lines, dots, and curves. Start with a small square and let your pen flow freely, filling the space with intricate designs. It’s a great way to relax, de-stress, and tap into your inner artistic zen.
4. Collaborative Monster Drawing:
Gather your friends or family for a fun and interactive drawing game. Start with a simple shape, like a circle, and each person takes turns adding a body part or feature to the creature. Let the monster evolve into a wacky and hilarious masterpiece through your combined creativity!
5. Silhouette Silhouettes:
Capture the essence of a person or object with a silhouette drawing. Find a backlit subject, like someone standing against a window, and trace their outline on paper. Focus on the negative space and the interplay of light and shadow to create a striking and minimalist artwork.
Exploring Drawing Techniques for Every Style
Embarking on an artistic adventure? Exploring different drawing techniques can unlock a vast spectrum of styles and expressions, transforming your blank page into a captivating canvas. Buckle up, as we journey through a treasure trove of techniques, tailored to ignite your creative spark!
1. Line Drawing: The dance of pure line, unblemished by shading or color, defines this elegant style. From the delicate precision of botanical illustrations to the bold, expressive strokes of figure sketches, line drawings capture essence with minimalist grace.
2. Stippling & Pointillism: A meticulous dance of tiny dots, these techniques weave light and shadow through a multitude of individual marks. Stippling employs a single color, while pointillism orchestrates a symphony of hues, optically blending to form rich, vibrant images.
3. Cross-hatching & Hatching: Layering lines like meticulous brickwork, these techniques build form and texture through intersecting or parallel strokes. Hatching emphasizes light and shadow with parallel lines, while cross-hatching adds depth and richness with their interwoven network.
4. Wash Drawing: Embrace the fluidity of water-based media like ink or watercolor in this technique. Layering washes creates subtle tonal variations, capturing the ethereal beauty of landscapes or the delicate fragility of flowers.
5. Negative Space Drawing: Sometimes, what you don’t draw speaks volumes. Negative space drawing focuses on the areas around your subject, using them to define its shape and create a sense of depth and intrigue.
6. Gesture Drawing: Capturing the essence of movement is the essence of gesture drawing. Quick, loose strokes capture the flow and dynamism of a figure or object, emphasizing action and energy over precise detail.
7. Anamorphic Drawing: Play with perception and bend reality with anamorphic drawing. These mind-bending illusions distort perspective, creating images that appear to change depending on your viewing angle.
Mastering Light and Shadow in Your Drawings
Ah, light and shadow – the dynamic duo that breathes life into your drawings! Mastering them takes your art from flat to fantastic, adding depth, dimension, and emotion to your creations. So, grab your trusty drawing tool and let’s embark on a journey to illuminate your artistic skills!
Understanding the Lingo:
- Light source: The origin of the light in your scene. It can be natural (sunlight) or artificial (lamplight).
- Highlight: The brightest area of your object, where the light hits directly.
- Mid-tone: The area between the highlight and the shadow, where the light gradually fades.
- Shadow: The area where the light is blocked, creating darkness.
- Cast shadow: The shadow an object projects onto another surface.
Observing and Sketching:
- Train your eye: Pay close attention to how light falls on objects in real life. Notice the gradual transition from light to shadow, the shape and intensity of the shadows, and how they interact with different surfaces.
- Practice light studies: Set up simple still lifes with different light sources and angles. Sketch the shapes and values of the light and shadow areas, focusing on capturing the relationships between them.
Shading Techniques:
- Hatching: Using parallel lines of varying thickness to create shades of gray.
- Cross-hatching: Intersecting hatching lines for darker tones and textures.
- Stippling: Building up shade with tiny dots.
- Blending: Smoothing transitions between light and shadow with a blending stump or your finger.
Tips and Tricks:
- Start simple: Begin with basic shapes and gradually add complexity as you get comfortable.
- Use reference photos: They can be a valuable tool for studying light and shadow in specific scenarios.
- Layer your shading: Build up your shadows gradually, adding darker layers on top of lighter ones.
- Pay attention to edges: The transition between light and shadow is often sharper at the edges of an object.
- Don’t be afraid of dark: Use dark values boldly to create contrast and depth.
- Remember, light reflects too! Objects can pick up subtle reflections of their surroundings, adding warmth and complexity to the shadows.
From Pen to Pixel: Drawing in the Digital Age
the age-old debate: pen or pixel? Fear not, for the digital age has opened a dazzling portal for artists, allowing them to seamlessly transition from the tactile world of pen and paper to the vibrant realm of digital creation. In this post, we’ll explore the exciting possibilities of drawing in the digital age, guiding you through the transition from traditional to digital artistry.
Embracing the Canvas of Light:
Gone are the days of messy pencils and smudged charcoal. Digital drawing tablets present a pristine canvas of light, offering a myriad of advantages:
- Undo with ease: No more cries of despair over spilled coffee or misplaced lines! Digital tools allow you to undo mistakes instantly, fostering a fearless and experimental approach.
- Endless possibilities: Unleash your inner alchemist! Experiment with a vast array of brushes, textures, and colors that would leave even the most stocked art supply store in awe.
- Layers upon layers: Build worlds of complexity. Digital layers let you stack and manipulate elements of your drawing independently, adding incredible depth and flexibility.
- Instant sharing: Gone are the days of waiting for scans or photographs. Share your masterpieces with the world in a click, connecting with art lovers across the globe in real-time.
Tools for Your Digital Toolbox:
Dive into the vibrant world of digital art with these essential tools:
- Drawing tablet: Your gateway to the digital canvas. Choose from pressure-sensitive tablets that mimic the feel of traditional drawing to more budget-friendly options for beginners.
- Drawing software: Explore a universe of possibilities! Adobe Photoshop and Procreate are industry standards, while free options like Krita and MediBang Paint offer excellent features for beginners.
- Brushes and textures: Expand your artistic vocabulary! Digital software lets you download and customize countless brushes and textures, from realistic charcoal to swirling nebulas.
The Artist's Journey Through Drawing
the artist’s journey through drawing! It’s a path paved with curiosity, wonder, frustration, and ultimately, profound satisfaction. Buckle up, dear reader, as we embark on this creative odyssey, exploring the transformative stages of an artist’s development:
The Nascent Spark:
It all begins with a flicker of curiosity. A child scribbles on a wall, drawn to the magic of creating marks on a surface. This is the birth of the artist, an innocent exploration of the world through lines and shapes.
The Apprentice:
Formal training begins, pencils meet paper, and lines become controlled. Rules and techniques are embraced, like building blocks for a creative future. Still life comes alive, landscapes unfurl, and the fundamentals of form and shading take root.
The Experimentation Phase:
Confidence grows, and the artist breaks free from the mold. Different media beckon, charcoal whispers its smoky allure, ink dances with water in graceful washes. This is a time of discovery, pushing boundaries, and finding a unique voice.
The Mastery Plateau:
Frustration sets in. Progress seems stagnant, lines wobble, and the once-enchanting canvas now reflects doubt. But persevere, dear artist! This plateau is fertile ground for growth, a crucible where skills are honed and resilience is forged.
Beyond the Horizon:
With dedication and time, the plateau yields to new vistas. Lines sing with precision, color blooms with confidence, and emotions pour onto the canvas. The artist finds their style, their message, their place in the artistic tapestry.
The Evolving Muse:
The journey never truly ends. Inspiration ebbs and flows, styles morph and adapt, and the blank page remains a challenge and a promise. The artist embraces this constant evolution, forever seeking new perspectives and pushing the boundaries of their own creativity.
Frequently Asked Questions (FAQs)
- A: Practice regularly, study different art styles, take art classes or tutorials, and seek constructive feedback. Observation and patience are key to improvement.
- A: Start with basic tools like pencils (HB, 2B, 4B), erasers, sketch pads, and a sharpener. As you progress, you may explore other mediums like charcoal, ink, or digital tools.
- A: Experiment with different techniques, subjects, and mediums. Your style will develop naturally over time as you incorporate elements you enjoy into your work.