Pixel code

Cow Drawing : Tips for Cow Drawing

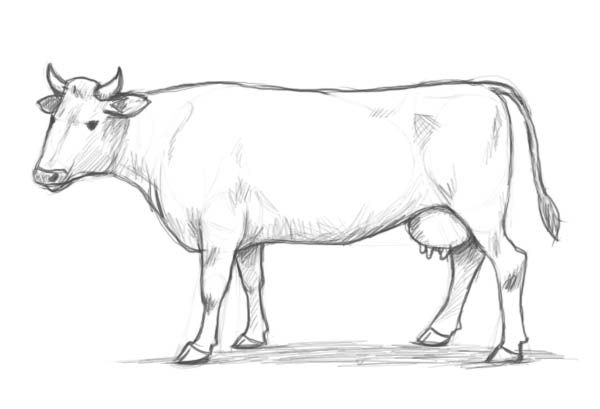
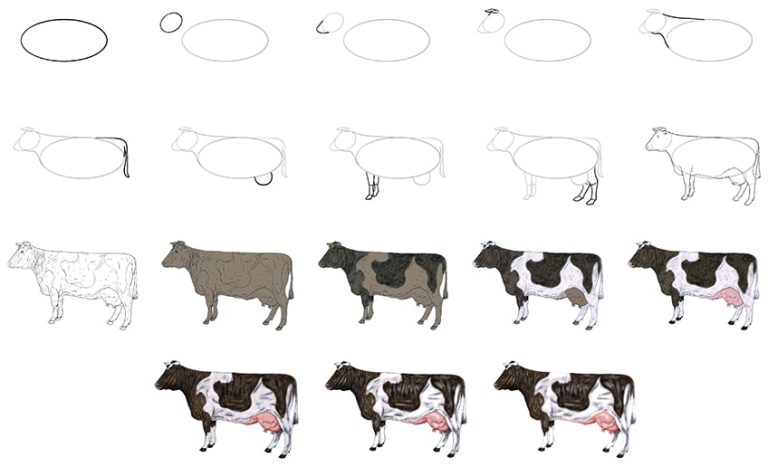
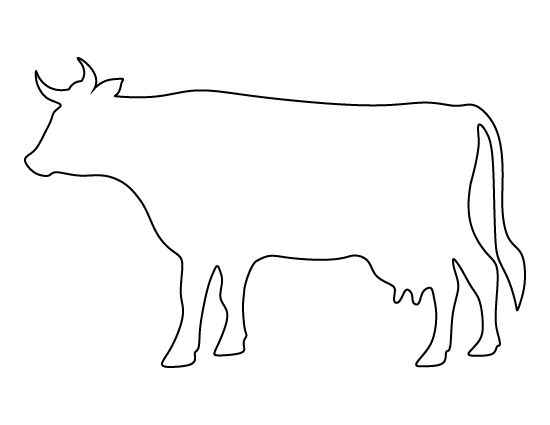
Cow Drawing can be a delightful artistic endeavor, requiring a keen eye for detail and a touch of creativity. Begin with the basic shape of the cow’s body, typically a large oval, and then add a smaller oval towards the rear for the hindquarters. Extend four curved lines downward from the body to form the legs, ensuring that they are proportionate.

A Guide to Cow Drawing

here’s a guide to cow drawing:

Materials:

  • Pencil
  • Eraser
  • Drawing paper
  • Optional: colored pencils, crayons, or markers

Instructions:

  1. Start with basic shapes. Use circles and ovals to sketch the head, body, and legs. Don’t worry about making them perfect; just get the general proportions right.
  2. Refine the shapes. Once you have the basic shapes, start to refine them. Add details like the ears, nose, eyes, and tail.
  3. Add fur and texture. Use short, choppy strokes to add fur to the cow’s body. You can also use different shades of pencil to create depth and shadow.
Cow2
Cow3

Mastering the Basics of Cow Drawing

Moo-ve over Picasso, it’s time to master the majestic art of cow drawing! Whether you’re a seasoned artist or just starting to moo-se your way into the world of sketching, this guide will provide you with the fundamentals to draw charming cows that’ll have you udderly impressed.

Gather your herd of art supplies:

  • Pencils: A trusty HB pencil for sketching and a 2B or 4B for adding shadows and depth.
  • Eraser: Because everyone makes mis-steaks sometimes!
  • Drawing Paper: Smooth, textured paper like Bristol Board is ideal for pencil drawings, but regular printer paper works too.
  • Optional: Sharpener, blending stump, colored pencils, crayons, or markers for adding splashes of color.


Cow4
Cow5

Cow Drawing for Beginners

It’s great you’re interested in drawing cows. Here’s a beginner-friendly guide to get you started:

Materials:

Steps:

  • Start with basic shapes:
    • Body: Large oval, slightly wider at the back.
    • Head: Smaller oval, attached to the body with a curved neck.
    • Legs: Four smaller ovals, positioned under the body for stability.
    • Tail: Short, curved line extending from the back.
Cow6
Cow7

A Step-by-Step Save Cow Drawing

Let’s create a heartwarming drawing of a cow being rescued from a flooded field, symbolizing hope and resilience!

Materials:

  • Pencil
  • Eraser
  • Drawing paper
  • Optional: Colored pencils, crayons, or markers

Steps:

  1. Sketch the Landscape:
    • Draw a curved line for the horizon, dividing the paper into sky and land.
    • On the land, sketch wavy lines to represent floodwater, with peaks and dips suggesting submerged ground.
  2. The Struggling Cow:
    • In the floodwater, draw a large oval for the cow’s body, tilted slightly to show its struggle.
    • Add a smaller circle above for the head, connected by a curved neck.
Cow8
Cow4

Cow Drawing Techniques

Ready to moo-ster your cow drawing skills? Let’s explore some techniques to take your bovine art to the next level!

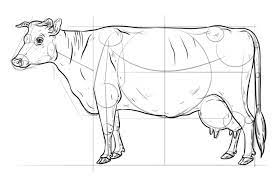
1. Mastering Proportions:

  • Grid method: Divide your paper into squares and sketch the cow’s basic shapes within them, referencing anatomical references for accurate proportions.
  • Comparative shapes: Use familiar shapes like circles, ovals, and rectangles to represent the head, body, legs, and other features.
  • Golden ratio: Apply the golden ratio (1:1.618) to divide the body and head for aesthetically pleasing proportions.

2. Adding Depth and Texture:

  • Shading: Use hatching, cross-hatching, and stippling techniques to create shadows, highlights, and fur texture. Experiment with different pencil grades for varying intensity.
  • Layering: Build up layers of pencil strokes for depth and realism, starting with light strokes and gradually adding darker layers.
Cow2

Frequently Asked Questions (FAQs)

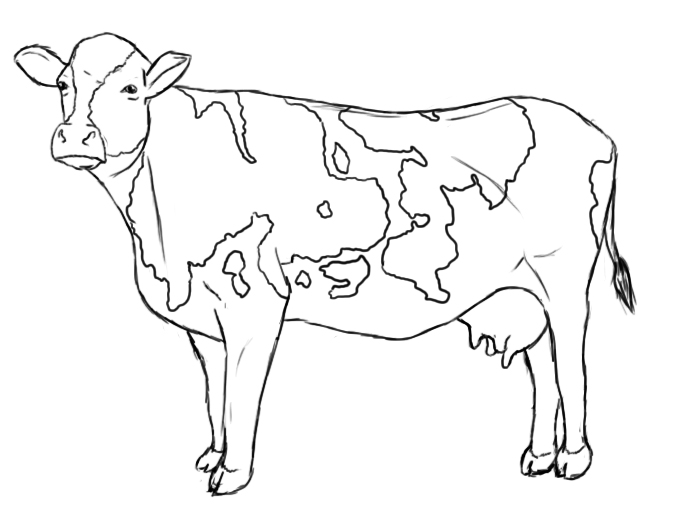
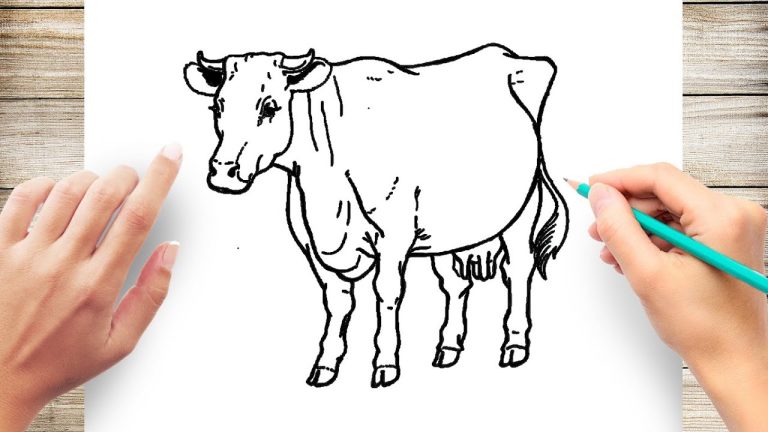
To draw a cow, follow these key steps:

  • Begin with a large oval for the body and a smaller oval for the hindquarters.
  • Extend four curved lines downward for the legs.
  • Use a slightly elongated oval for the head, adding pointed ears and a curved neck.

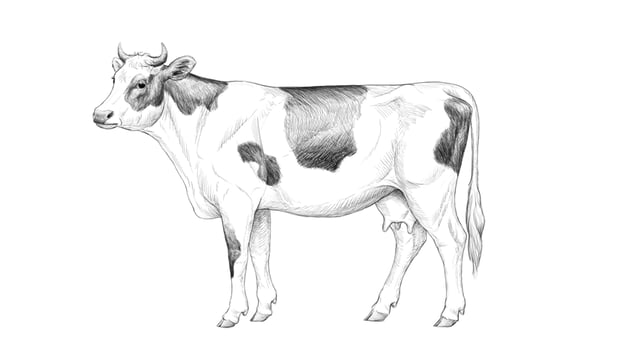
To make your cow drawing look more realistic:

  • Pay attention to proportions, ensuring the body, legs, and head are appropriately sized.
  • Add details such as shading to create depth and texture.
  • Observe reference images of real cows to capture accurate features.

Absolutely! Different types of cows may have distinct features. For dairy cows, you might want to emphasize their udder and a more streamlined body. Beef cattle may have a stockier build, and certain breeds have unique characteristics

Most Popular Links

Career Tests

21st Century Test For Working Professionals
Graduates & Post Graduates
21st Century Test For 12th
21st Century Skills & Learning Test Grade 12
21st Century Test For 11th
21st Century Skills & Learning Test Grade 11
21st Century Test For 10th
21st Century Skills & Learning Test Grade 10
Career Test (1)
PSYCHOMETRIC IDEAL CAREER TEST™
Skill Based Career Test 1
PSYCHOMETRIC SKILL BASED TEST FOR 9TH
Engineering Branch Selector
PSYCHOMETRIC ENGINEERING SELECTOR
Professional Educator Index
PSYCHOMETRIC EDUCATOR PROFESSIONAL SKILLS
Stream Selector Test
PSYCHOMETRIC STREAM SELECTOR™
Commerce Career Test
PSYCHOMETRIC COMMERCE CAREER SELECTOR
Humanities Career Test
PSYCHOMETRIC HUMANITIES CAREER SELECTOR
Professional Skill Test
PSYCHOMETRIC PROFESSIONAL SKILL INDEX

Recent Posts

People Also Viewed

Top Private Universities

Most Popular Universities

Trending Colleges

Upcoming Exams

21st Century Skills & Learning Test

Career Counselling Services

Popular Exams

Most Popular Article's

Send this to a friend
Hi, this may be interesting you: Cow Drawing : Tips for Cow Drawing! This is the link: https://institute.careerguide.com/cow-drawing/