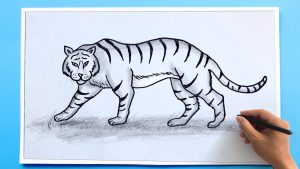
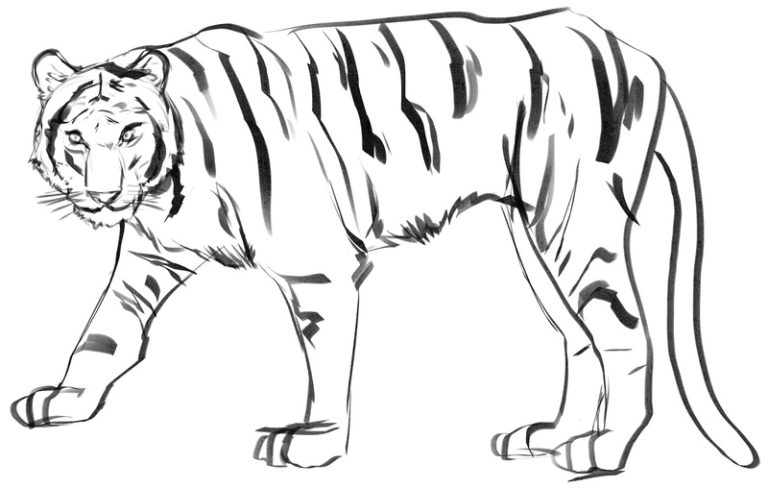
Creating a captivating tiger drawing involves capturing the majestic beauty and strength of this magnificent big cat. Begin by sketching the basic outline, paying careful attention to the proportions of the body, head, and tail. Tigers have distinct facial features, including powerful jaws and expressive eyes, so focus on these details to convey their wild and intense nature. Incorporate the characteristic stripes that adorn their fur, using varying thickness and spacing to add realism
A Guide to Tiger Drawing
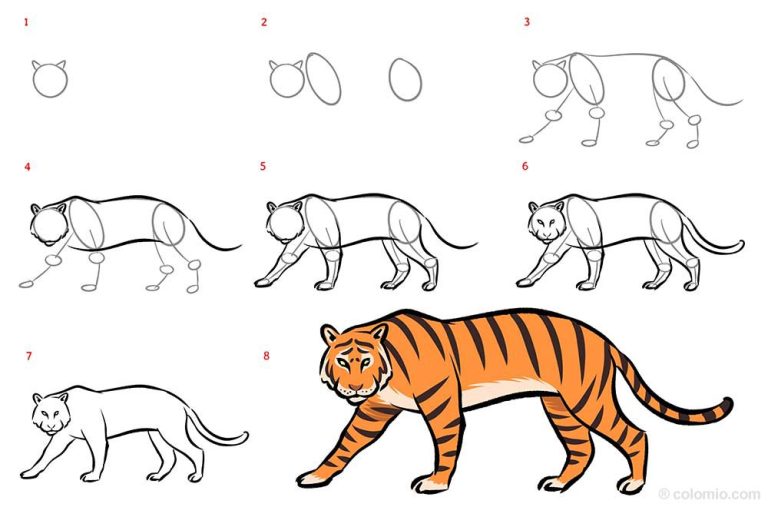
Drawing a majestic tiger can be a challenging yet rewarding experience. Here’s a guide to help you capture the power and grace of this iconic animal:
Materials:
- Pencil (HB, 2B, and 4B)
- Eraser
- Sharpener
- Drawing paper (smooth or textured)
- Colored pencils, markers, or paints (optional)
Steps:
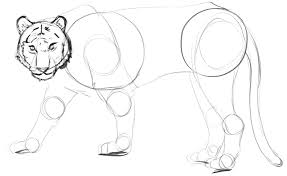
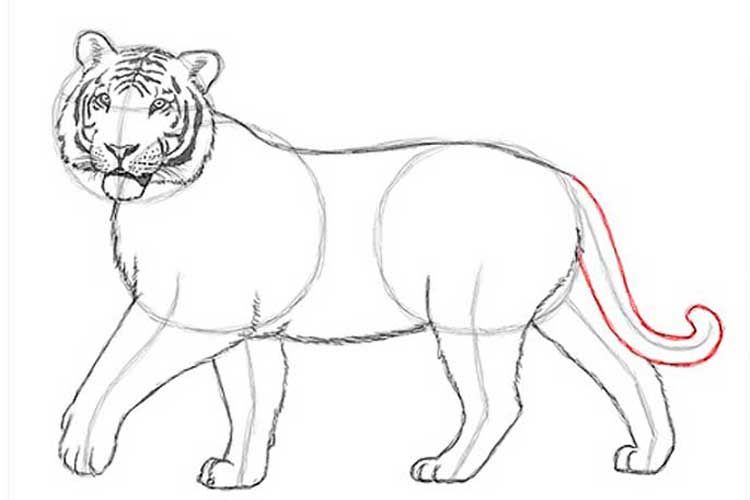
- Start with basic shapes:
- Draw a large circle for the head.
- Draw an oval below the head for the chest, slightly smaller than the head.
- Draw another oval below the chest for the pelvis, slightly smaller than the chest.
- Connect the head and chest with two curved lines for the neck.
- Connect the chest and pelvis with another curved line for the torso, arched slightly to show movement or posture.
Mastering the Basics of Tiger Drawing
Drawing a tiger that truly roars with life goes beyond just the basic shapes and stripes. Here’s a guide to take your tiger drawing to the next level:
Anatomy and Movement:
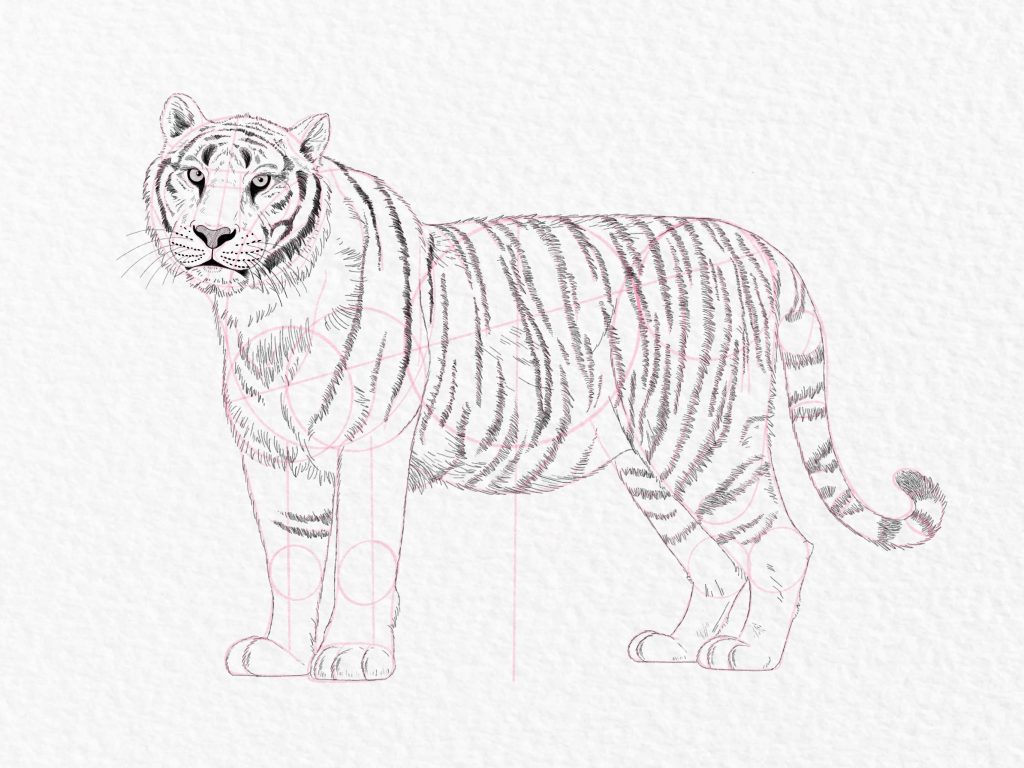
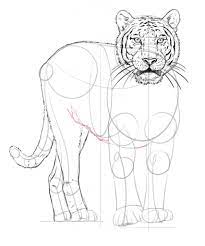
- Muscles and Form: Don’t just sketch outlines, understand the underlying musculature of a tiger. Pay attention to how different muscle groups flex and contract during movement, adding depth and power to your drawing. Use reference photos from various angles to study their anatomy.
- Pose and Gesture: Capture the essence of the tiger’s movement with dynamic poses. Use gesture drawing to quickly sketch the overall action and refine it later. Consider the weight distribution and balance of the tiger in different poses.
- Proportions and Perspective: Ensure proper proportions between the head, body, and limbs. Apply perspective principles when drawing the tiger in different environments, adjusting the size and foreshortening of body parts depending on their distance from the viewer.
Tiger Drawing for Beginners
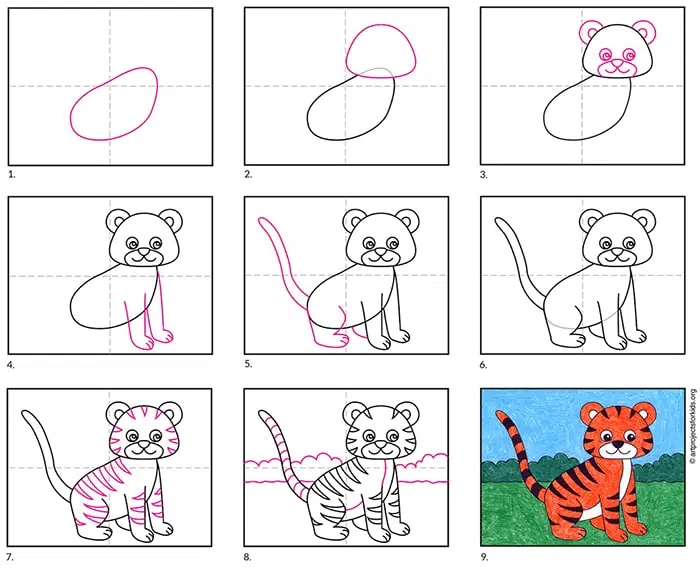
Drawing a majestic tiger doesn’t have to be daunting! Here’s a simplified guide to help you capture the essence of this magnificent creature, even if you’re just starting out:
Materials:
- Pencil (HB or 2B)
- Eraser
- Sharpener
- Drawing paper
- Colored pencils, markers, or crayons (optional)
Steps:
- Start with basic shapes:
- Draw a large circle for the head.
- Draw an oval below the head for the chest, slightly smaller than the head.
- Draw another oval below the chest for the pelvis, slightly smaller than the chest.
- Connect the head and chest with two curved lines for the neck.
- Connect the chest and pelvis with another curved line for the torso.
- Add four triangles for the legs, two on each side.
- Draw a long, curved line for the tail, starting near the pelvis and tapering towards the end.
A Step-by-Step Save Tiger Drawing
In this guide, we’ll draw a powerful tiger leaping to protect its environment from harm. Let’s unleash our creativity and raise awareness for tiger conservation!
Materials:
- Pencil (HB, 2B, and 4B)
- Eraser
- Sharpener
- Drawing paper
- Colored pencils, markers, or paints (optional)
Steps:
Dynamic Pose:
- Draw a large oval tilted upwards for the body, representing the tiger leaping.
- Sketch two smaller ovals, one above the body for the head and one below for the pelvis, both tilted slightly in the opposite direction for counterbalance.
- Connect the head and body with two curved lines for the neck.
- Draw four triangles for the legs, two bent upwards for powerful thrust and two extended downwards for balance.
- Sketch a long, curved line for the tail flowing dynamically behind the body.
Refine the Anatomy:
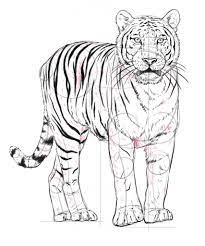
- Refine the head oval, adding details like the jawline, brow, and pointed ears.
- Sketch the facial features: two expressive eyes, a triangular nose, and a wide mouth open in a determined roar.
- Add muscle definition to the body, especially the legs and shoulders, emphasizing the power in the pose.
- Refine the legs with paws and sharp claws extended.
Tiger Drawing Techniques
Drawing a realistic and majestic tiger goes beyond the basic steps. Here are some advanced techniques to elevate your tiger drawings:
Anatomy and Movement:
- Muscle Groups and Movement: Understand the underlying musculature of a tiger and how different groups contract and relax in various poses. Study anatomical references and observe real tigers in action to capture their dynamic movement accurately.
- Weight Distribution and Balance: Pay attention to the weight distribution of the tiger in different poses. Consider the center of gravity and how the legs balance the body, especially in dynamic leaps or attacks.
- Perspective and Foreshortening: When drawing the tiger in complex poses or environments, apply perspective principles. Adjust the size and foreshortening of body parts depending on their distance from the viewer.
Stripes and Texture:
- Stripe Variation and Flow: Remember, stripes aren’t just straight lines. They vary in thickness, curve with the body’s contours, and even have branches and forks. Study real tiger photos and reference anatomical illustrations to capture this natural variation.
- Fur Texture and Shading: Use advanced shading techniques like stippling, scumbling, and blending to create realistic fur texture. Consider light and shadow play on different fur lengths and textures, like the sleek fur on the head and the coarse fur on the belly.
Frequently Asked Questions (FAQs)
Pay attention to Spider-Man’s dynamic poses, emphasizing his agility. Focus on the details of his costume, including the web pattern, the spider emblem, and the unique shape of his mask with expressive eyes.
Use shading and highlights strategically to create a sense of dimension. Consider the light source and add shadows to emphasize the contours of Spider-Man’s muscular physique.
Inject your personal style into the drawing. Experiment with different poses, facial expressions, or even explore alternate costume designs. Adding a unique background or setting can also make your Spider-Man drawing stand out.