Peacock Drawing is a captivating artistic endeavor that allows one to capture the regal beauty of this magnificent bird on paper. The intricate plumage, characterized by a mesmerizing array of iridescent hues, presents both a challenge and an opportunity for creative expression. Begin by sketching the graceful body, paying attention to the distinctive features such as the long neck, slender legs,
A Guide to Peacock Drawing
Peacock Drawing A majestic bird adorned with a dazzling plumage, it’s a natural muse for any artist. Whether you’re a seasoned drawer or just starting out, capturing the essence of this feathered wonder can be both challenging and rewarding. Here’s your guide to drawing a peacock that will truly strut its stuff on paper:
Anatomy and Proportion:
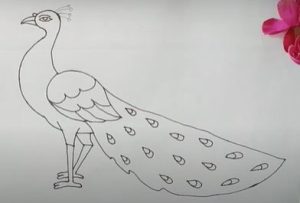
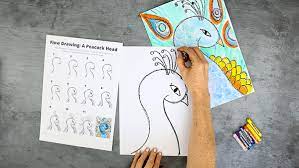
- Start with basic shapes: Begin by outlining the peacock’s body with simple shapes like ovals and circles for the head and chest, cylinders for the legs, and a triangle for the beak. Don’t worry about details yet, focus on getting the overall proportions right.
- Refine the form: Once you have the basic shapes, add details like the neck, curved lines for the wings and tail, and short lines for the legs. Pay attention to the graceful S-curve of the neck and the elongated body.
Drawing the Beauty of Peafowl
Peafowl, with their iridescent plumage and captivating presence, are natural muses for any artist. Whether you’re a seasoned sketcher or just starting out, translating their beauty onto paper can be a rewarding journey. Here’s your guide to drawing peafowl that will leave you strutting with pride:
Understanding the Form:
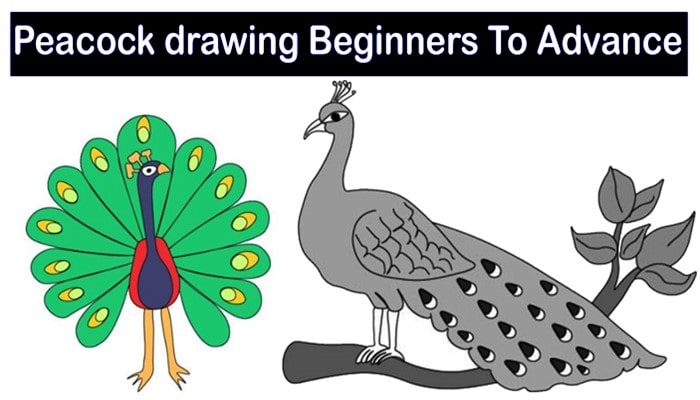
- Start with the basics: Begin by outlining the peafowl’s body with simple shapes. Use ovals for the head and chest, cylinders for the legs, and triangles for the beak and tail base. Focus on capturing the overall proportions, like the elongated body and graceful neck.
- Refine the details: Once you have the basic shapes, add details like the curved lines for the wings and tail, short lines for the legs, and a small, sharp beak. Pay attention to the S-curve of the neck and the distinctive crest on the head.
Unveiling the Feather Fanfare:
- The crown jewel: Now comes the moment of truth – the tail feathers! Draw a curved line from the base of the tail, and then branch out with individual feathers. Start with simple shapes like elongated ovals or triangles, and later add details like barbs and spots.
Techniques for Peacock Illustration
the peacock! A majestic bird radiating iridescent splendor, it’s a natural muse for any artist. Let’s dive into some techniques you can use to create stunning peacock illustrations, safe and sound:
Capturing the Majestic Form:
- Start with structure: Sketch the basic framework using simple shapes like ovals for the head and chest, cylinders for the legs, and triangles for the beak and tail base. Remember the elegant S-curve of the neck and elongated body.
- Refine the details: Layer on the feather outlines like curved lines for wings and the tail fan. Don’t sweat perfection yet, focus on capturing the graceful proportions and movement.
Unveiling the Dazzling Plumage:
- The crown jewel: Now, it’s time for the tail feathers! Draw a curved line from the base, branching out with individual feathers. Start simple with elongated shapes and add intricate barbs and spots later.
- Layers of iridescence: Remember, a peacock’s tail is multi-layered! Draw additional rows behind the first, gradually reducing size for depth. Don’t forget the mesmerizing “eye” patterns on some feathers.
Creating a Peacock Drawing with Impact
Let’s ignite your creative spark and craft a peacock drawing that leaves a lasting impression! Here are some strategies to inject impact and bring your feathered masterpiece to life:
Composition and Focal Point:
- Rule of thirds: Imagine your drawing divided into nine equal squares. Place the peacock’s head or tail feathers on one of the four intersection points to create a dynamic composition.
- Negative space: Utilize negative space around the peacock for emphasis. A stark background can make the iridescent plumage really pop.
- Intentional cropping: Don’t be afraid to cut off parts of the bird. A close-up on the tail feathers or head can create a dramatic and impactful view.
Emphasizing the Plumage:
- Focal point color: Choose one dominant color for the main section of the tail feathers. Let this color draw the viewer’s eye and command attention.
- Light and shadow play: Use varying tones within the feathers to create depth and dimension. Highlight the tips of the “eyes” with white or metallic accents for extra sparkle.
- Textural details: Experiment with different techniques to depict the texture of the feathers. Consider using dry brushing, stippling, or even collage elements like fabric or textured paper.
Adding Drama and Energy:
- Dynamic pose: Show the peacock in action! Depict it fanning its feathers, strutting with confidence, or even leaping through the air. Avoid static poses for a more captivating image.
- Movement lines: Use subtle lines radiating from the bird’s body to suggest movement and energy. This can enhance the feeling of a dynamic pose.
Infusing Personality into Peacock Drawings
Let’s breathe life into your peacock drawings and make them strut with personality! Here are some safe and creative ways to unleash their inner sparkle:
Capture the Gaze:
- Eye contact: Give your peacock piercing eyes that draw the viewer in. Maybe they’re full of curiosity, mischief, or regal confidence.
- Head tilt: A curious tilt of the head adds a playful touch, while a haughty angle can convey an air of superiority.
- Feather crown: Play with the crown feathers! Arrange them like a mischievous Mohawk, a graceful upsweep, or even a messy bedhead to reflect the peacock’s mood.
Body Language Speaks Volumes:
- Strut and swagger: Exaggerate the peacock’s natural graceful stride. A proud chest-out, slightly lifted tail, and confident steps tell a story of inner strength.
- Dance and prance: Let your peacock twirl! Capture the fluidity of its movements as it fans its feathers, dips its head, or takes a playful hop.
- Preening and posing: Show your peacock lost in self-admiration. Fluff those feathers, check out every angle, and let its vanity shine through (peacocks do it best!).
Color and Pattern Palette:
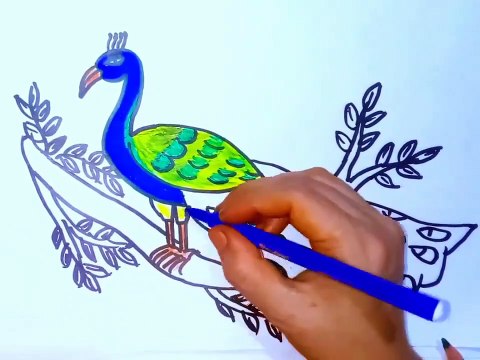
- Mood through hues: Opt for vibrant blues and greens for a majestic feel, fiery oranges and reds for boldness, or soft pastels for a gentle, ethereal air.
- Patterns with personality: Experiment with feather markings! Add playful polka dots, bold stripes, or intricate swirls to reflect the peacock’s unique flair.
- Metallic magic: Don’t shy away from metallic accents! A touch of gold on the “eyes” or along the feather edges can add an air of regality and shimmer.
Tips for Realistic Peacock Illustrations
Bringing peacocks to life on paper requires keen observation and artistic skill. Here are some tips to ensure your illustrations soar with realism:
Anatomy and Proportion:
- Reference is key: Use high-quality photos or observe real peacocks to study their proportions, feather placement, and subtle anatomical details. Pay attention to the elongated body, curved neck, and powerful legs.
- Start with basic shapes: Block out the body with simple shapes like ovals and cylinders for head and chest, triangles for beak and tail base. This helps capture the overall balance before tackling intricate details.
- Refine gradually: Once the basic shapes are in place, add details like wing curves, leg lines, and the distinctive crest atop the head. Remember the graceful S-curve of the neck and the gentle tapering of the body towards the tail.
Feather Finery:
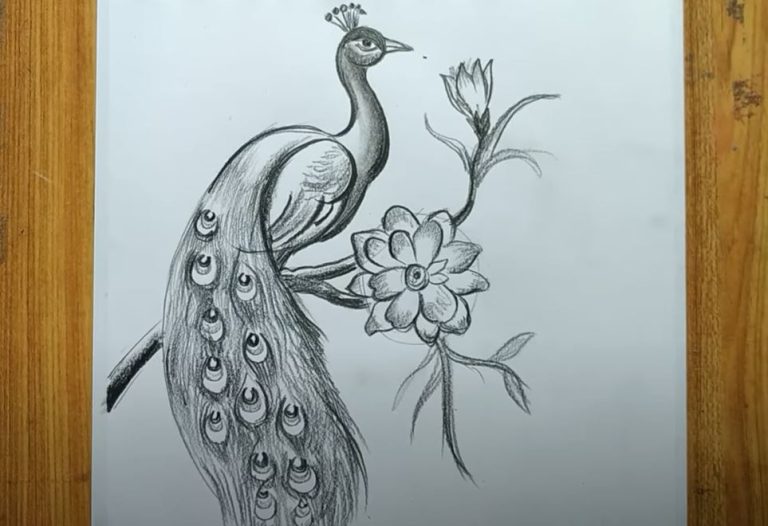
- Layering creates depth: A peacock’s tail boasts multiple layers of feathers. Draw the main layer first, with each subsequent layer decreasing in size and detail. This creates a sense of depth and volume.
- Individuality in each feather: Observe the variations in feather shapes and patterns. Some are elongated ovals, others have barbs and intricate markings. Don’t shy away from adding these details for added realism.
- Iridescent magic: Capture the mesmerizing shimmer of peacock feathers! Experiment with metallic paints, iridescent markers, or layering different shades of blues, greens, and purples to recreate their otherworldly sheen.
Bringing it to Life:
- Pose and expression: Don’t just draw a static bird! Choose a dynamic pose like fanning the tail, strutting confidently, or preening its feathers. This adds personality and engages the viewer.
- Eye contact and personality: Give your peacock expressive eyes that draw the viewer in. Adjust the tilt of the head and feather crown to convey curiosity, regality, or even mischief.
Expressive Approaches to Peacock Drawing
Let’s dive into the world of expressive peacock drawings! Instead of focusing on strict realism, let’s unleash your artistic voice and explore ways to capture the essence and emotions of these majestic birds through your unique style. Here are some ideas to get you started:
Emotional Palette:
- Fiery Passion: Let your peacock blaze with vibrant reds, oranges, and yellows. Use bold strokes and dynamic poses to capture a fiery temperament, perhaps with feathers swirling like flames.
- Serene Tranquility: Opt for soft blues, greens, and purples, with gentle washes and delicate lines. Show your peacock gracefully gliding through water or peacefully preening, feathers flowing like calming waves.
- Melancholy Beauty: Explore deeper shades of blue, purple, and black, with wispy strokes and subtle details. Create a peacock lost in thought, feathers drooping slightly, conveying a sense of quiet contemplation.
Symbolic Storytelling:
- Mythical Guardian: Draw your peacock as a watchful protector, feathers adorned with ancient symbols and patterns. Use strong lines and geometric shapes to create a sense of power and mystery.
- Transformation and Rebirth: Capture the peacock’s association with renewal and change. Use swirling lines, overlapping feather layers, and vibrant color transitions to depict the metamorphosis from humble chick to resplendent creature.
Frequently Asked Questions (FAQs)
- Start with simple shapes: Begin by sketching basic shapes like circles, ovals, and rectangles to represent the head, torso, and limbs. This will help you build a foundation for your drawing before adding details.
- Pay attention to proportions: The proportions of a girl’s body are generally different from those of a boy. For example, the head is typically larger in proportion to the body, and the waist is narrower than the hips.
- Oversexualization: Avoid drawing girls in overtly suggestive poses or clothing. Focus on capturing their personality and individuality rather than their physical attributes.
- Clichés and stereotypes: Don’t fall into clichés like damsels in distress or overly bubbly princesses. Be creative and explore diverse representations of girls.
- Art books and tutorials: There are many great books and online tutorials available that can teach you how to draw girls in different styles. Look for resources specifically focused on female figure drawing or character design.
- Online communities: Join online communities or forums for artists who draw girls. This is a great way to get feedback on your work, learn from others, and stay inspired.